Editor’s Note: This article contains curated affiliate links. A small commission may be earned on the materials recommended, at no added cost to the purchaser.
There is something deeply satisfying about skipping the plastic dye kits and slowing down to make something real. This year, the most beautiful eggs aren’t perfectly smooth or brightly colored—they are textured, matte, and feel like they were gathered from the garden or found in an antique shop.

We’ve rounded up five of our favorite techniques that look incredibly high-end but are surprisingly forgiving to make.
Whether you want the look of botanical dyes or a touch of gold, these methods turn a simple afternoon craft into a beautiful set of decor you’ll want to keep on display all spring.
Shop the Edit
2026 Egg Decorating Supply List
1. The Speckle
The Vibe: Organic, wild, and collected.
This technique mimics the look of wild bird eggs—like quail or robin—transforming a standard white egg into something that looks foraged from the forest floor. It creates a “specimen” quality that feels incredibly high-end.

The Ink Wash
Squeeze a dime-sized amount of brown or black acrylic paint into a cup and dilute it with water until it is the consistency of ink.
The Method
Dip a stiff paintbrush (or an old toothbrush) into the paint. Hold it over the egg and run your thumb across the bristles to flick tiny splatters onto the shell. Vary the distance to get a mix of fine mist and larger spots.
SPRING NEST
These speckled eggs look best clustered in a moss-filled bowl or nest or tucked into individual place settings.
2. The “Chinoiserie” (Napkin Decoupage)
The Vibe: Delicate blue-and-white glaze.
Hand-painting tiny flowers is incredibly difficult, but decoupage creates the exact same look in minutes. It’s the ultimate high-reward, low-effort project.

The Secret
Use a patterned paper napkin. Peel off the back white layers so you are left with just the thin, printed top sheet.
The Method
Tear—don’t cut—the design into small pieces. Paint a little Mod Podge on the egg, place your paper, and smooth it down. The paper is so thin it practically melts into the shell, looking just like a painted glaze.
3. PANTRY-DYED EGGS
The Vibe: Moody, organic, and totally natural.
The most sophisticated color palette is achieved through a natural dyeing process using everyday produce. By simmering pantry staples like red cabbage and turmeric, you create deep, earthen washes that feel intentional and old-world, rather than artificial.


The Leaf Trick
Before dipping, press a small fern leaf or parsley sprig against the shell and wrap the egg tightly in a square of cheesecloth or old tights. When you unwrap it later, you’ll have a perfect white silhouette of the plant left behind.

DYE GUIDE
Robin’s Egg Blue
Simmer red cabbage with a splash of vinegar.
Warm Gold
Stir turmeric powder into boiling water.
Pale Pink to Dark RED
Steep a pot of beet juice, the longer you leave the eggs in the more red they will become.
4. Gold Leaf EASTER EGGS
The Vibe: Perfectly imperfect.
There is no need to cover the whole egg in gold. This look is inspired by the Japanese art of Kintsugi (repairing pottery with gold), highlighting the cracks and natural texture.

The Method
Take a dyed, plain white, or brown egg and brush random, organic strokes of adhesive on the shell.
The Sparkle
Press a sheet of gold leaf onto the sticky spots, then use a dry brush to sweep away the excess. You’re left with flakes of gold that catch the candlelight—a little bit glam, but still very organic.
Hosting Tip
Since this method is dry and mess-free, it is the perfect activity for the interactive egg atelier we featured in our Spring Hosting Guide.
5. COTTAGECORE: Pressed FlowerS
The Vibe: A spring garden, preserved.
If you’re dreaming of a cottage garden, this technique brings that energy right to your table. It treats the eggshell like the page of a botanical book.
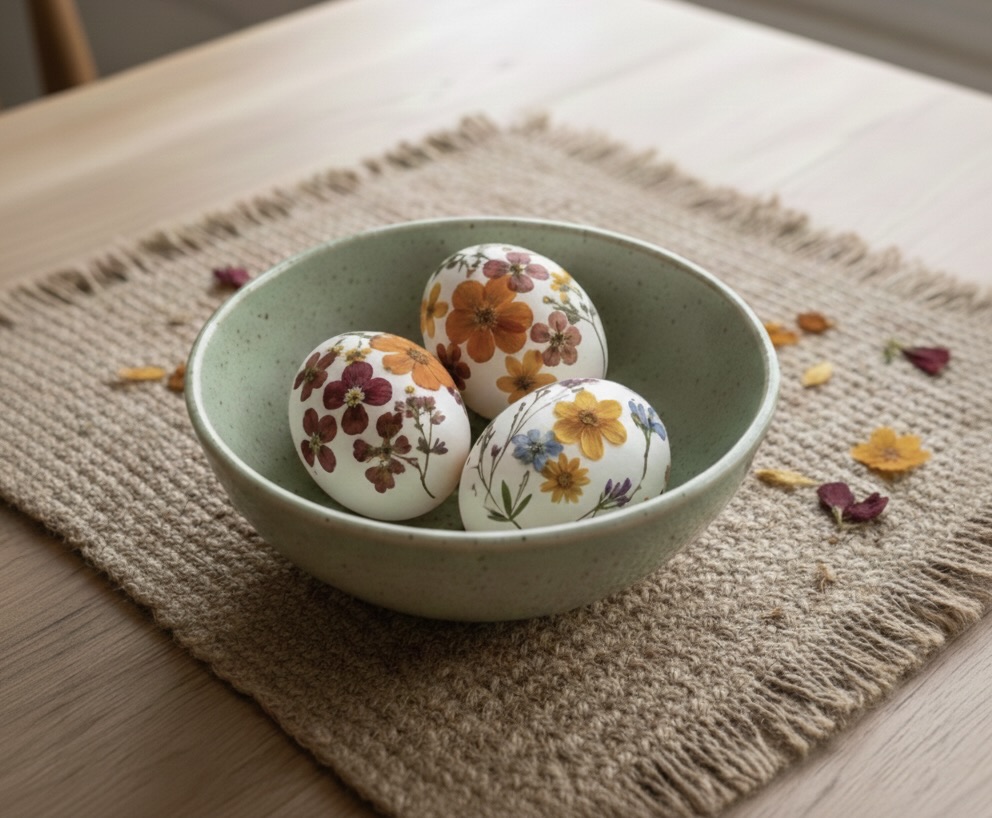

The Flowers
Use tiny dried blooms like violas, pansies, or fern fronds (you can press your own or buy a pre-pressed pack).
The Finish
Use a small brush to adhere the flower to the egg with decoupage glue. Add a few thin topcoats to seal it in. The result is a smooth, porcelain-like finish where the flowers look suspended in time.
Alternatively, skip the top coat entirely and adhere only the center of the bloom, allowing the delicate edges of the petals to curl slightly away from the shell. This creates a tactile, three-dimensional look that celebrates the fragile beauty of the dried florals.
Shop the Edit
2026 Egg Decorating Supply List

Leave a Reply